Magic Eye FX is highly versatile and thanks to it’s many function, can be used for a huge range of applications, from gaming, to assessment to communication.
Watch our tutorial to get an overview of the Magic Eye FX UI and learn how to navigate and use all the different functions.
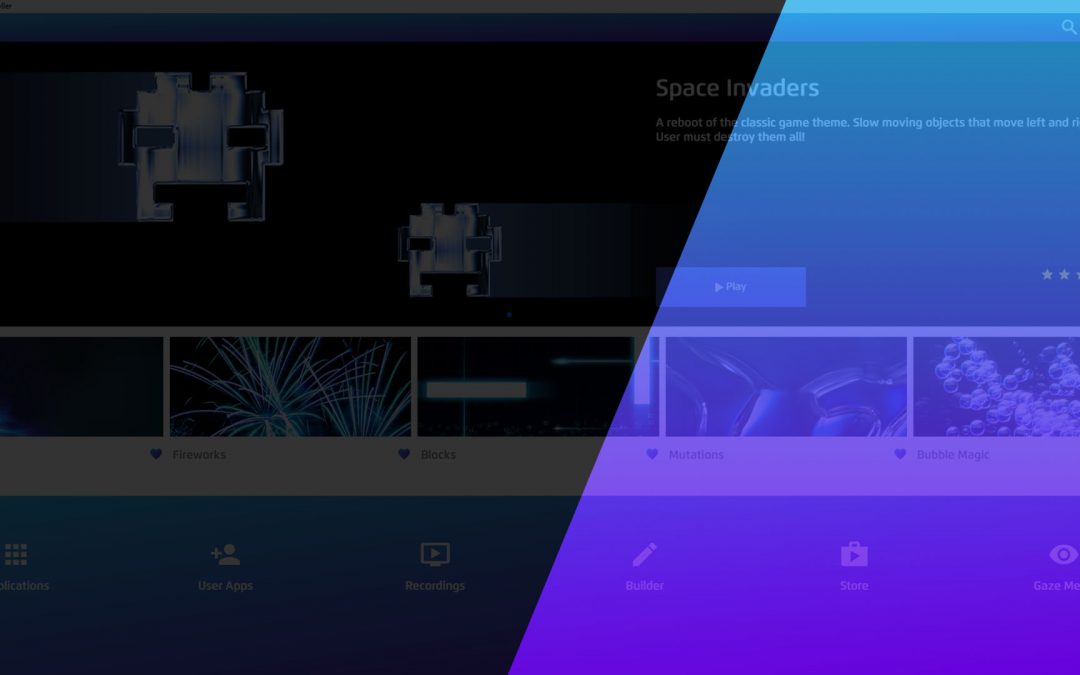
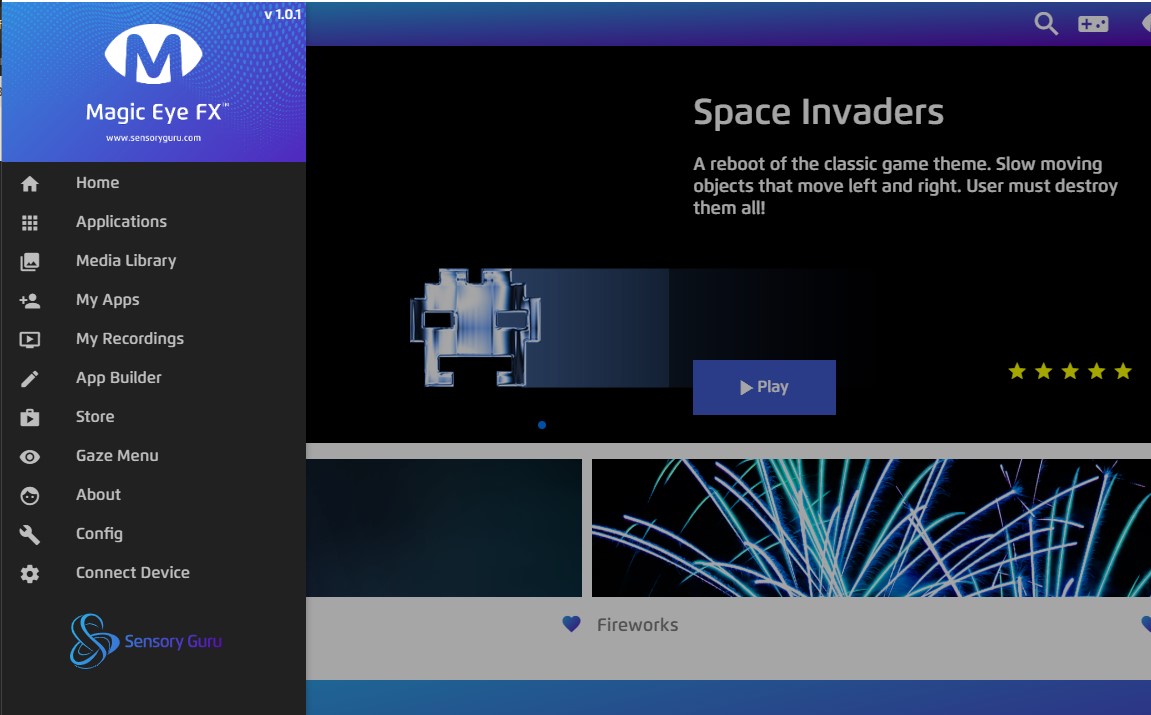
Home Screen

When you open the software you will be presented with the home screen, where we have shortcuts to a number of features including:
- Favourites apps bar – Your favourited apps will appear here
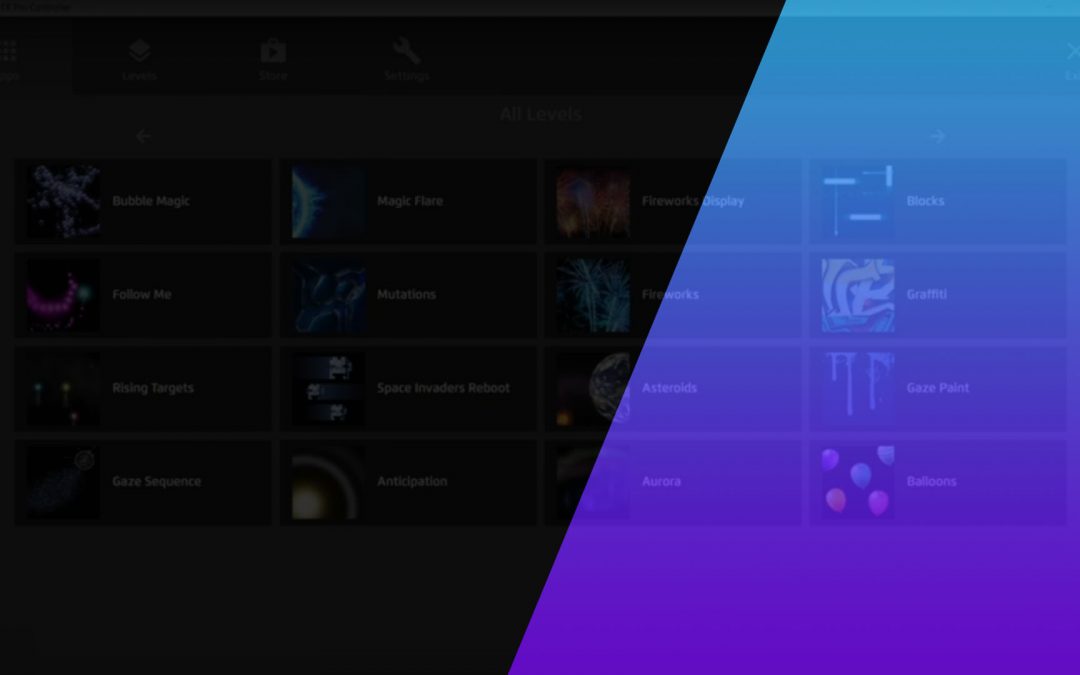
- Applications – Takes you to the applications library where you can browse the standard 40 applications that come with Magic Eye FX as well as any other applications that have been added or created
- User Apps – Takes you to a library of all apps created by you
- Recordings – Takes you a video library of all in-app recordings you have recorded.
- App Builder – Here you can create your own content
- App Store – Currently under construction, but when completed will provide access to even more pre-made content
- Gaze Menu – Takes you to gaze friendly UI – see our Gaze Menu tutorial for more information.
Top Bar
- Side Menu – To the right of the screen is the hamburger menu, three lines. Clicking on this opens the side menu.
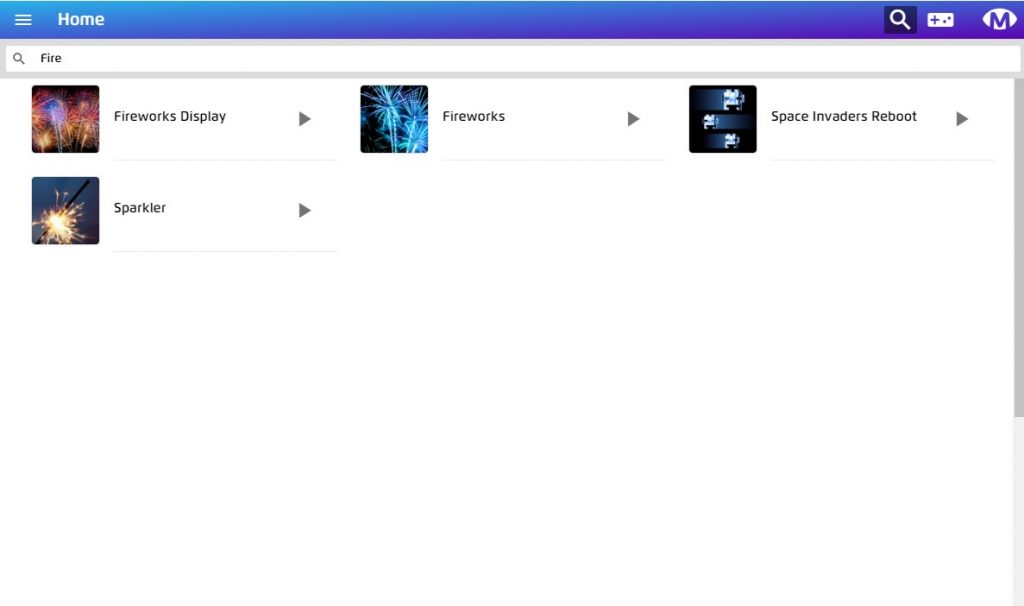
- Search Bar – If you are searching for a particular app, enter the name and it will find any apps realted to your search.
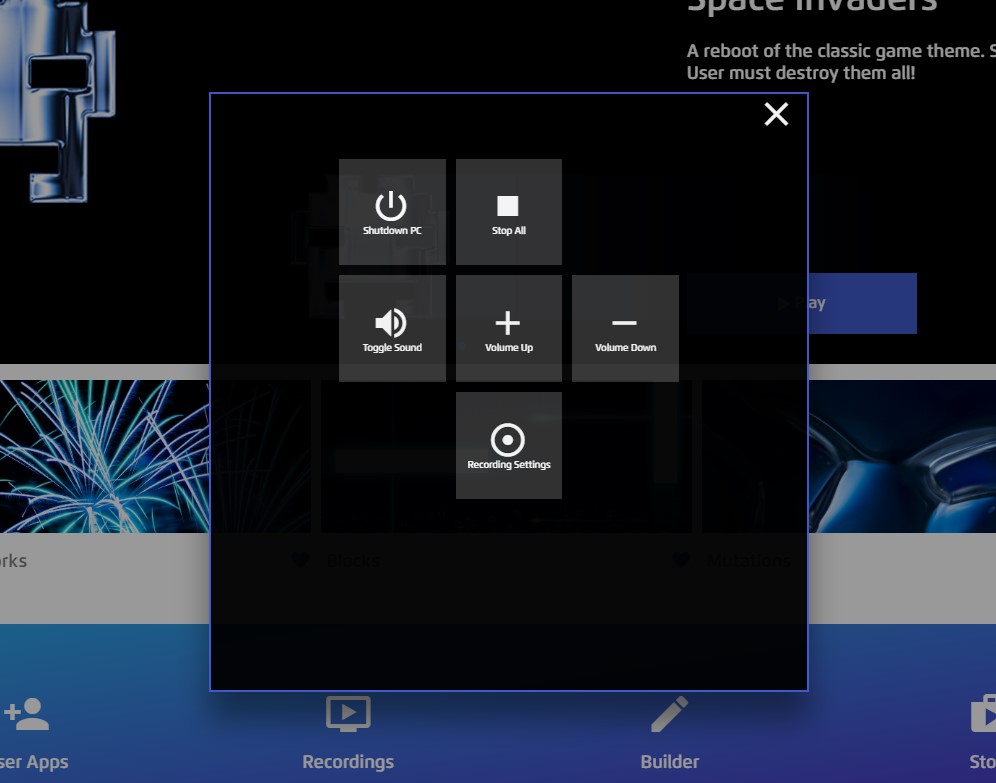
- Control Panel – The control panel where you can access PC shutdown shortcut, volume settings and recording settings.The control panel is optimised for the companion app, allowing you to control certain settings without interrupting a users session. For example, you can begin a recording if you are working with someone and you’d like to capture what’s happening in the moment.
-
Recording Settings –
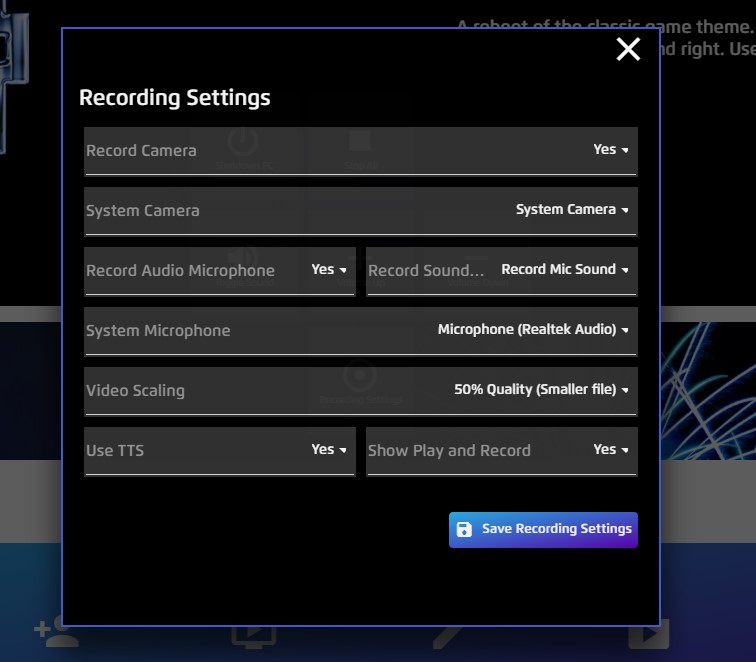
- Record Camera – Options Yes/No. We can record camera as well as in-apps. For example, when working with the user and recording an app in in play we can also record any cameras attached to the device e.g. a webcam. This is helpful for analytics as we can see facial expressions or see if anything is going on in the environment.
- System Camera – You can select which camera to record from. Click to see and select.
- Record Microphone Sound – Options Yes/No. Allows you to enable your devices microphone for recordings.
- Record Sound Input – Options Game Sound / Microphone Sound. Choose if we want to hear the game sounds or sounds from the environment and users.
- Video Scaling – Options 25% / 50% / 100% Quality. Allows you to adjust the file size with 25% creating the smallest file size and 100% being full HD and the largest file size.
- Text to Speech – Options Yes/No. You can enable text to speech.
- Show Play and Record – Options Yes/No. When set to yes, when you open an app you have an option to play and record. This enables you to run the game and record at the same time until you exit the app.
Side Menu
- Login area (Pro) – An instructor can create user accounts. When logged into a user account you can access recordings made of that user. o
- Home – Takes you to the home screen
- Applications – Takes us to the the full list of applications available to you.
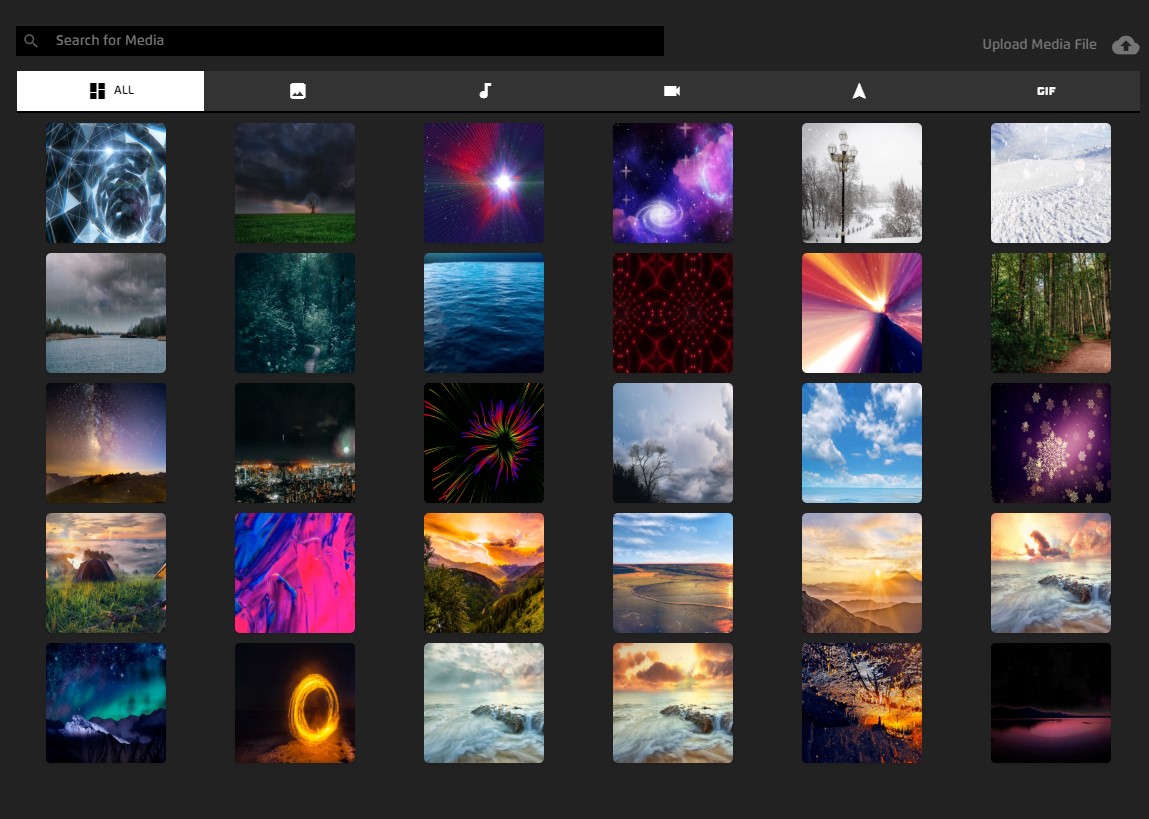
- Media Library – This is an incredibly useful tool for creating content. It has hundred of images, videos, animations, cursors and sounds. You can also upload your own media files here as well.
- My Apps – Takes you to the content and apps you have created using the app builder.
- My Recordings – Takes you to any video recordings you have made.
- App Builder – Where you can create your own, custom apps with an endless array of options.
- Store – Currently under construction, but when completed will provide access to even more premade apps.
- Analytics (Pro) – This will open the seperate analytics software, which is intended for use with your recordings. It provides detailed data of your sessions. In analytics, gameplay, camera feed and gaze data can be overlaid for in-depth analysis.
- Gaze Menu – Takes you to the Gaze UI
- About – Takes you to company details and a contact form, so you can contact us from direct the software.
- Config – Software settings for optimised access
- Language – set your language for the user interface.
- Graphics Quality – Options Best Quality / Best Performance – Graphic settings relate to the hardware. If you’re PC has a dedicated graphics card set to best quality which is going to ensure all features are active including recording. If you’re PC doesn’t have graphics capabilities then you’re going to want to set this to best performance. This will reduce a lot of the software overheads as well as make recording inactive.
- Switch Activation – Assign switch keys to activation. Essentially, the switches you would like enabled for gameplay. Brings down a checklist of options.
- Dwell Time – Increase/decrease dwell time in increments of 0.1 second for dwell users. Changes dwell time globally across the software.
- Access Menu Gaze Control – Options Active/Inactive. Allows you to control whether the Access Menu can be accessed during gameplay. You may want to switch this off if you find your user is inadvertently calling the access menu. The menu can still be toggled manually using the F7 and F8 keys.
- Access Menu Voice Control – Options Active/Inactive. Toggle the ability to access the gaze menu with voice control.
- Gaze Speed – Options Slow/Medium Slow/Medium Fast/Fast. This is another performance setting, if using a high spec PC then changing to slow/medium slow will create a smoother gaze cursor movement. For lower spec PC’s Medium Fast/Fast speeds up the cursor and creates a more function experience.
- Custom Switch Inputs – Options Use Custom/Use System. As standard space and return switches are used for activating objects. You can set you own custom key values using switch settings, select custom and check from othe options for switch 1 and switch 2.
- Connect Device – This brings up a QR code and lists an IP address. This can be used to connect Magic Eye FX to the companion app.